Getting started with IoT

Khalil Khoury
FounderIn this guide we are exploring IoT from a beginner’s point of view, aiming at building from scratch a simple IoT solution for collecting real time environmental data from our office and uploading it to the cloud, using of-the-shelf components and readily available online services. We composed it while working on a live demo for our IoT platform. You can see the live data from this implementation here.
We will be providing step-by-step instructions for building the components of a simple IoT solution that will consist of:
- a makeshift environmental monitoring station based on a Raspberry Pi equipped with a Sense HAT
- a WiFi router with an internet connection
- an online IoT platform for managing and visualizing the collected data
If you are interested in learning more about the main components of every IoT solution, as well as what to expect from an IoT device management platform, we have written this comprehensive article about it.
Building a makeshift environmental monitoring station#
Our goal is to build a environmental monitoring station that will be constantly collecting environmental data from our office and upload it to the cloud. While there is a vast variety of variables that can be monitored in an indoors environment, we will be concentrating on measuring the following, that are correlated with our comfort while working in our office:
- temperature
- air humidity
- atmospheric pressure
Hardware#
The Raspberry Pi single board computer is a very good entry point for everyone coming from an IT background interested in getting started with IoT. A number of fully fledged operating systems can be installed to it, including the Linux based Raspberry Pi OS, enabling use of high level programming languages. At the same time it enables interfacing with a vast variety of sensors, via its general purpose input/output (gpio) pin header and is compatible with a number of widely used interfaces, including SPI and I2C, while it comes with on board Wireless LAN and Bluetooth. In parallel, a number of third party manufacturers have created hardware extensions (Raspberry Pi hats), allowing for implementation of numerous IoT use cases.

For our makeshift environmental monitoring station we will be using a Raspberry Pi 3B, running Raspberry Pi OS Lite (Kernel version: 5.10), with a Sense HAT. Please note that as the computation requirements for this task are minimal, any Raspberry Pi with a 40 pin gpio header will do just fine.
The Sense HAT is an extension for the Raspberry PI that includes the following sensors:
- Gyroscope
- Accelerometer
- Magnetometer
- Temperature
- Barometric pressure
- Humidity
At the same time there is a Python Library for it, allowing very easy integration.
The following hardware is required for building the environmental monitoring station:
- Raspberry Pi
- SD card (8 GB or more)
- Power supply
- Sense HAT
Setting Up the Raspberry Pi#
Install & Setup Raspberry Pi OS Lite#
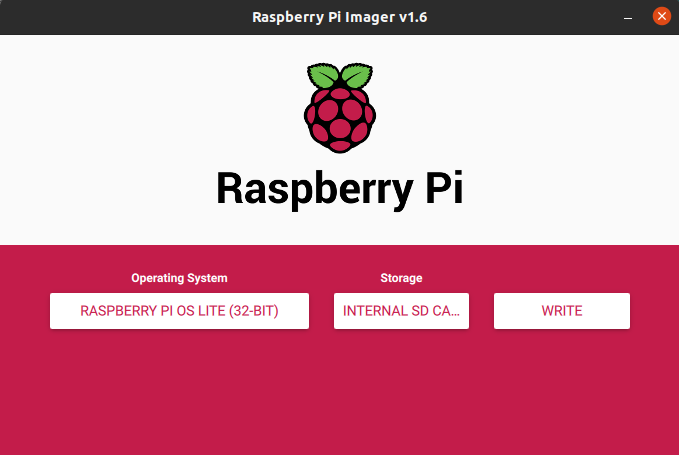
The first step is to install the Raspberry Pi OS Lite image and setup WiFi and SSH. The easiest way to do that is to use the Raspberry Pi Imager. It is available for Ubuntu, macOS and Windows and you can download it from the Raspberry Pi Foundation’s official website. After installation, select the Raspberry Pi OS Lite image,as well as the location of your SD.
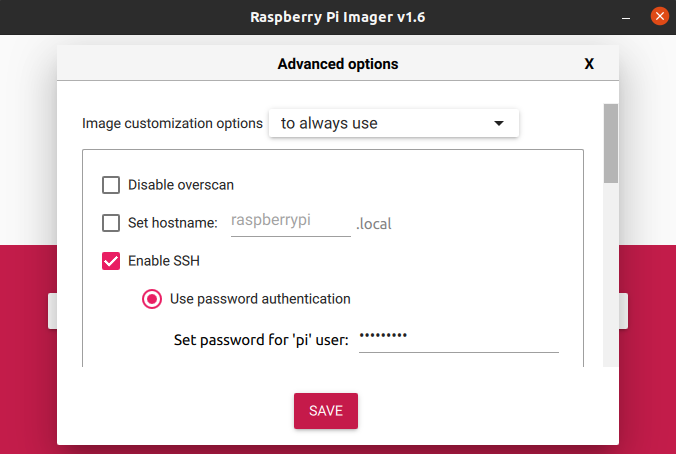
By typing Ctrl + Shift + X you can access the Advanced Settings menu. On it you can enable SSH and set up a WiFi connection. After this step you are ready to write the image on the SD card.
Once you have competed the installation, insert the SD card to the Raspberry Pi, power it up and connect to it with an SSH client.
Update and install the required packages#
After connecting to your Raspberry Pi update and upgrade the OS:
Install the python package manager and the sense-hat library:
Then install the datetime, json, pytz, requests, and time libraries using pip3:
Programming the environmental monitoring station#
We have written a simple script that measures the relative humidity, atmospheric pressure and temperature approximate every second and uploads every 10 minutes average values to Atman IoT, our IoT device management platform (setup instructions), via it's API. You can find more information about the API endpoint we are using in Atman IoT's API Reference guide. Keep in mind that you can apply this script to an IoT platform of your choice by adapting the postToAPI() function. Feel free to play around with the code and change it according to your monitoring requirements.
Create a .py file and copy into it the above script using pico or any other command line text editor:
Substitute the “DATA_LOGGER_ID” and “DATA_LOGGER_TOKEN” values with the id and token of the created data logger that you will acquire after setting up the IoT platform.
Creating a service to launch the script#
Create a launcher script using the following command:
Then copy into it the following
Make the launcher script executable with the following command:
After creating the launcher, the next step is to create a system service that will be launching our script on system start up, monitoring its execution and relaunching it if for some reason it stops:
Copy into the above file the following and save it:
That’s it. We can now start the service:
And automatically get it to start on boot:
Connecting to an IoT platform#
The final step is to connect your environmental monitoring station with an IoT platform in order to be able to upload your data to it, manage it and create charts for visualizing it. In this step we will be using our own platform Atman IoT. Of course, you can connect it to a platform of your choice.
You can connect your environmental monitoring station to the Atman IoT platform by completing the following steps
- create a free account - Step 1
- add a data logger and get a DATA_LOGGER_ID and a DATA_LOGGER_TOKEN and add them to your script - Step 2
- create an asset - Step 3
- create a custom user dashboard for and add charts - Step 4
Closing#
That's it, you have created your first IoT application. You can use the principles you learned in this guide, explore different Raspberry Pi hats and build your own solution to a number of IoT use cases.
If you are interested in this topic, you can subscribe to our mailing list and receive notifications about new posts, when we publish them.
Resources#
- Installing operating system images – raspberrypi.org
- Introducing Raspberry Pi Imager, our new imaging utility – raspberrypi.org
- Sense HAT - Python Library documentation – pythonhosted.org
- Atman IoT platform – Atman IoT